前言
全文更新完毕,zeek那部分,老实说,关于路由设置一直有一个问题,某厂的文章中设置的是2,我文中设置的内容为1,但是看起来好像并不会影响什么,我环境中route print看到的是1,实际也确实能检测到流量
然后就在想,这个日志的,跟路由有啥关系吗(
正文
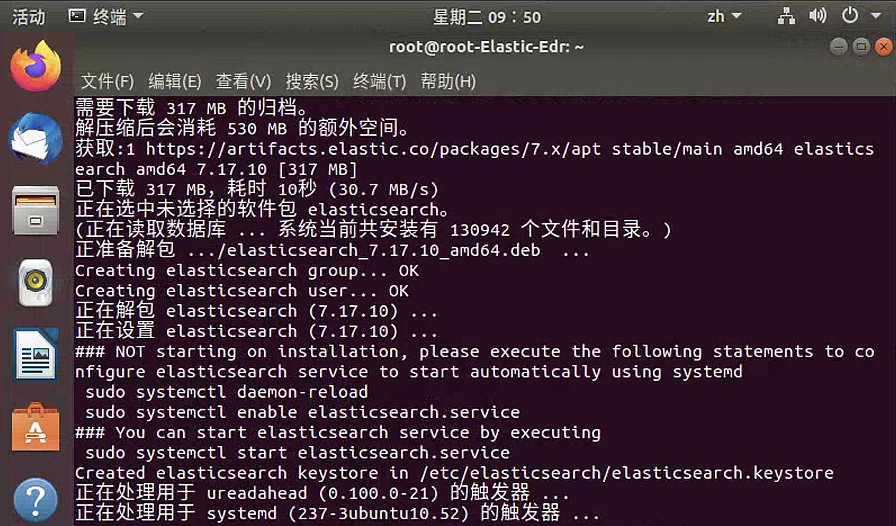
安装elasticsearch
按照一下步骤安装elasticsearch
1
2
3
4
5
6
| apt-get install curl apt-transport-https
curl -s https://artifacts.elastic.co/GPG-KEY-elasticsearch | apt-key add -
echo "deb https://artifacts.elastic.co/packages/7.x/apt stable main"
tee /etc/apt/sources.list.d/elastic-7.x.list
apt-get update
apt-get install elasticsearch
|
如果你觉得安装的慢的话,可以考虑以下步骤
1
2
| https://www.elastic.co/downloads/ # 下载安装包
dpkg -i elasticsearch-7.11.1-amd64.deb
|
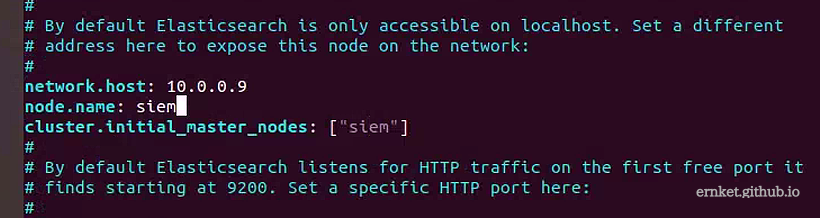
接着进入配置文件/etc/elasticsearch/elasticsearch.yml中新增配置
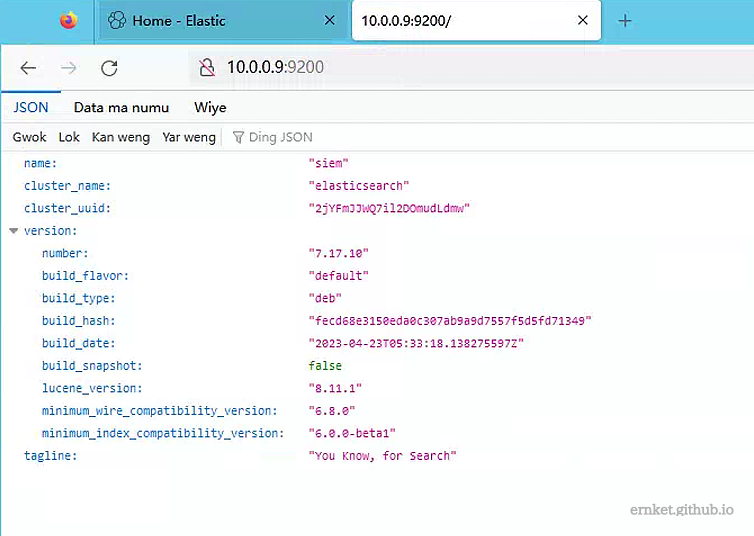
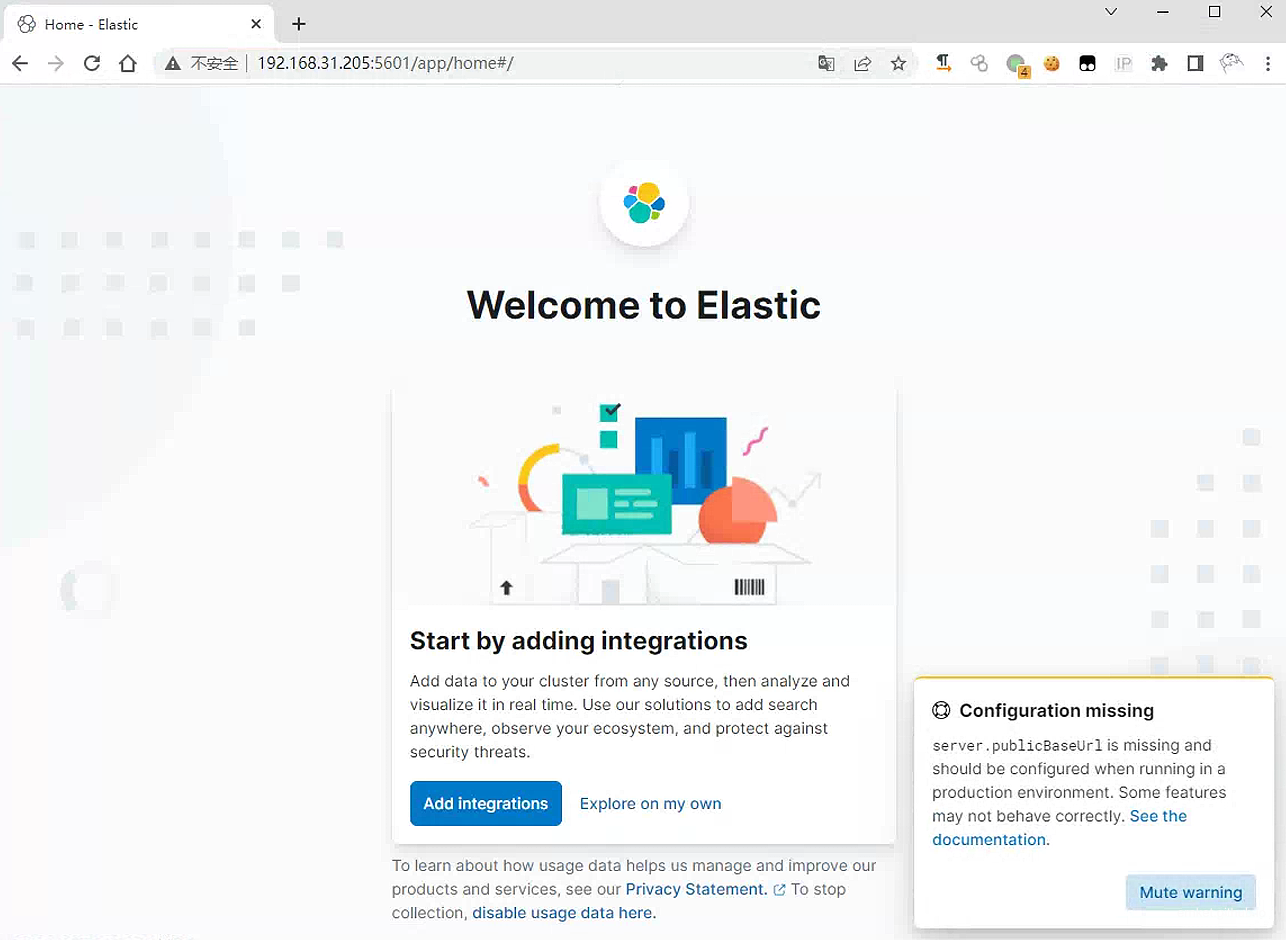
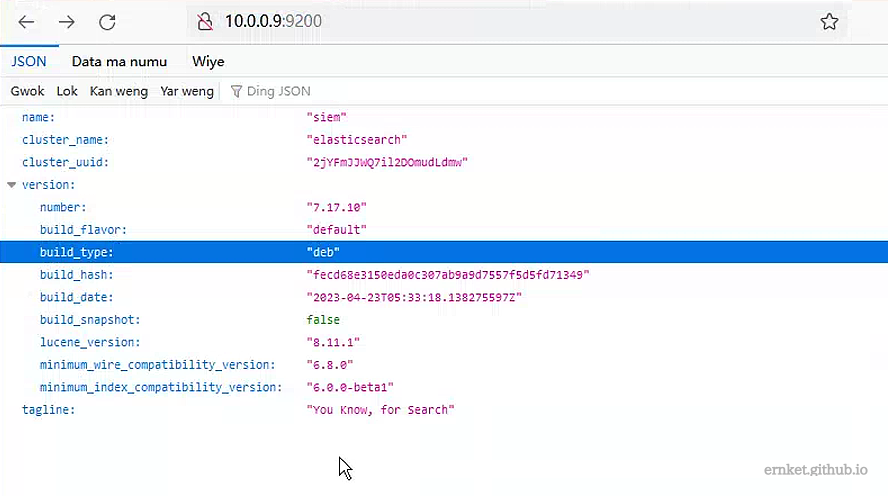
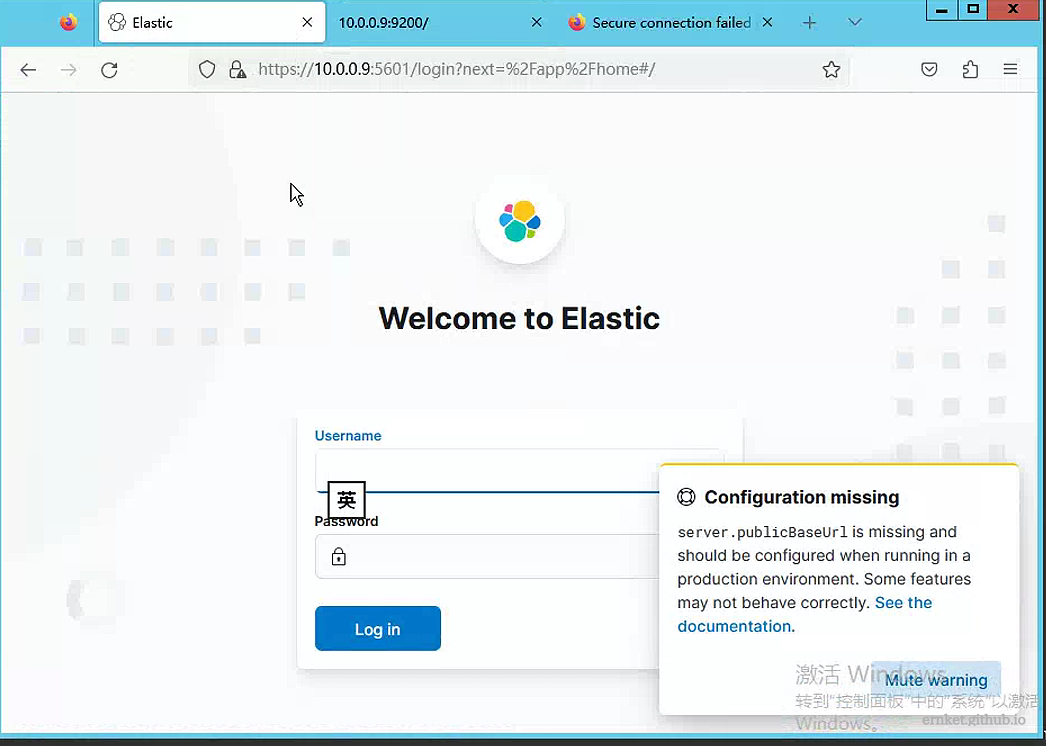
启动成功后,访问9200端口,出现如下界面说明成功
安装kibana
如果你觉得慢的话,可以考虑本地安装
1
2
| https://www.elastic.co/downloads/ # 下载安装包
dpkg -i kibana-7.11.1-amd64.deb
|
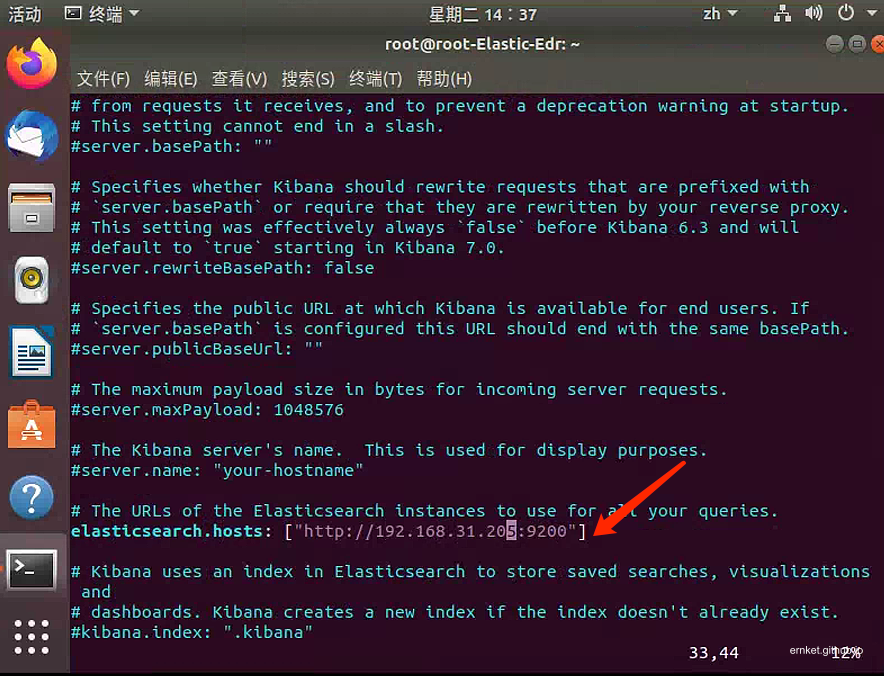
安装完毕后,修改配置文件/etc/kibana/kibana.yml,指定ip
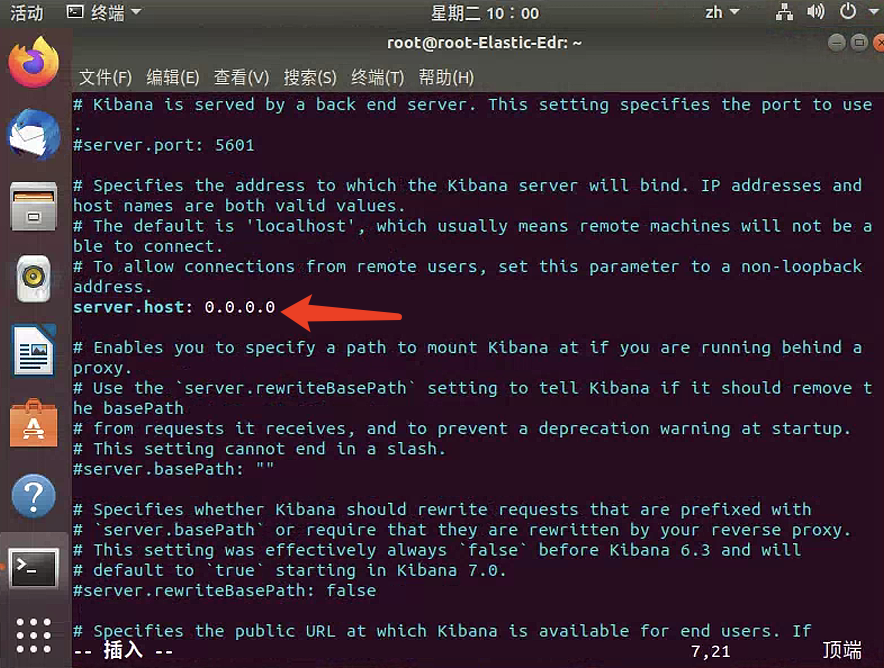
以及elasticsearch.host的地址
接着重启后,访问url即可
1
2
| service elasticsearch restart
service kibana restart
|
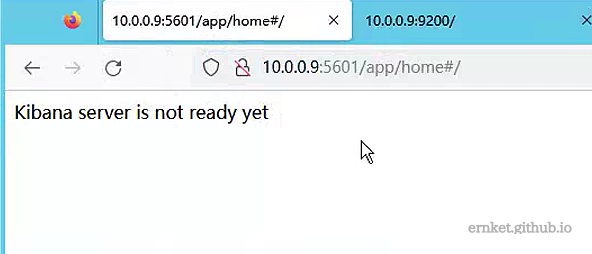
如果出现了下面的界面
1
2
3
| 1.kibana和elasticsearch的版本不一致
2.elasticsearch.host地址配置有误
3.Kibana刚重启完,还没完全启动,稍等一会刷新就ok了
|
配置SSL和身份验证
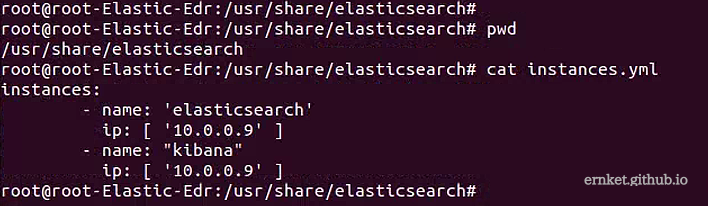
新建配置文件/usr/share/elasticsearch/instances.yml,内容如下
1
2
3
4
5
| instances:
- name: 'elasticsearch'
ip: [ '10.0.0.9' ]
- name: "kibana"
ip: [ '10.0.0.9' ]
|
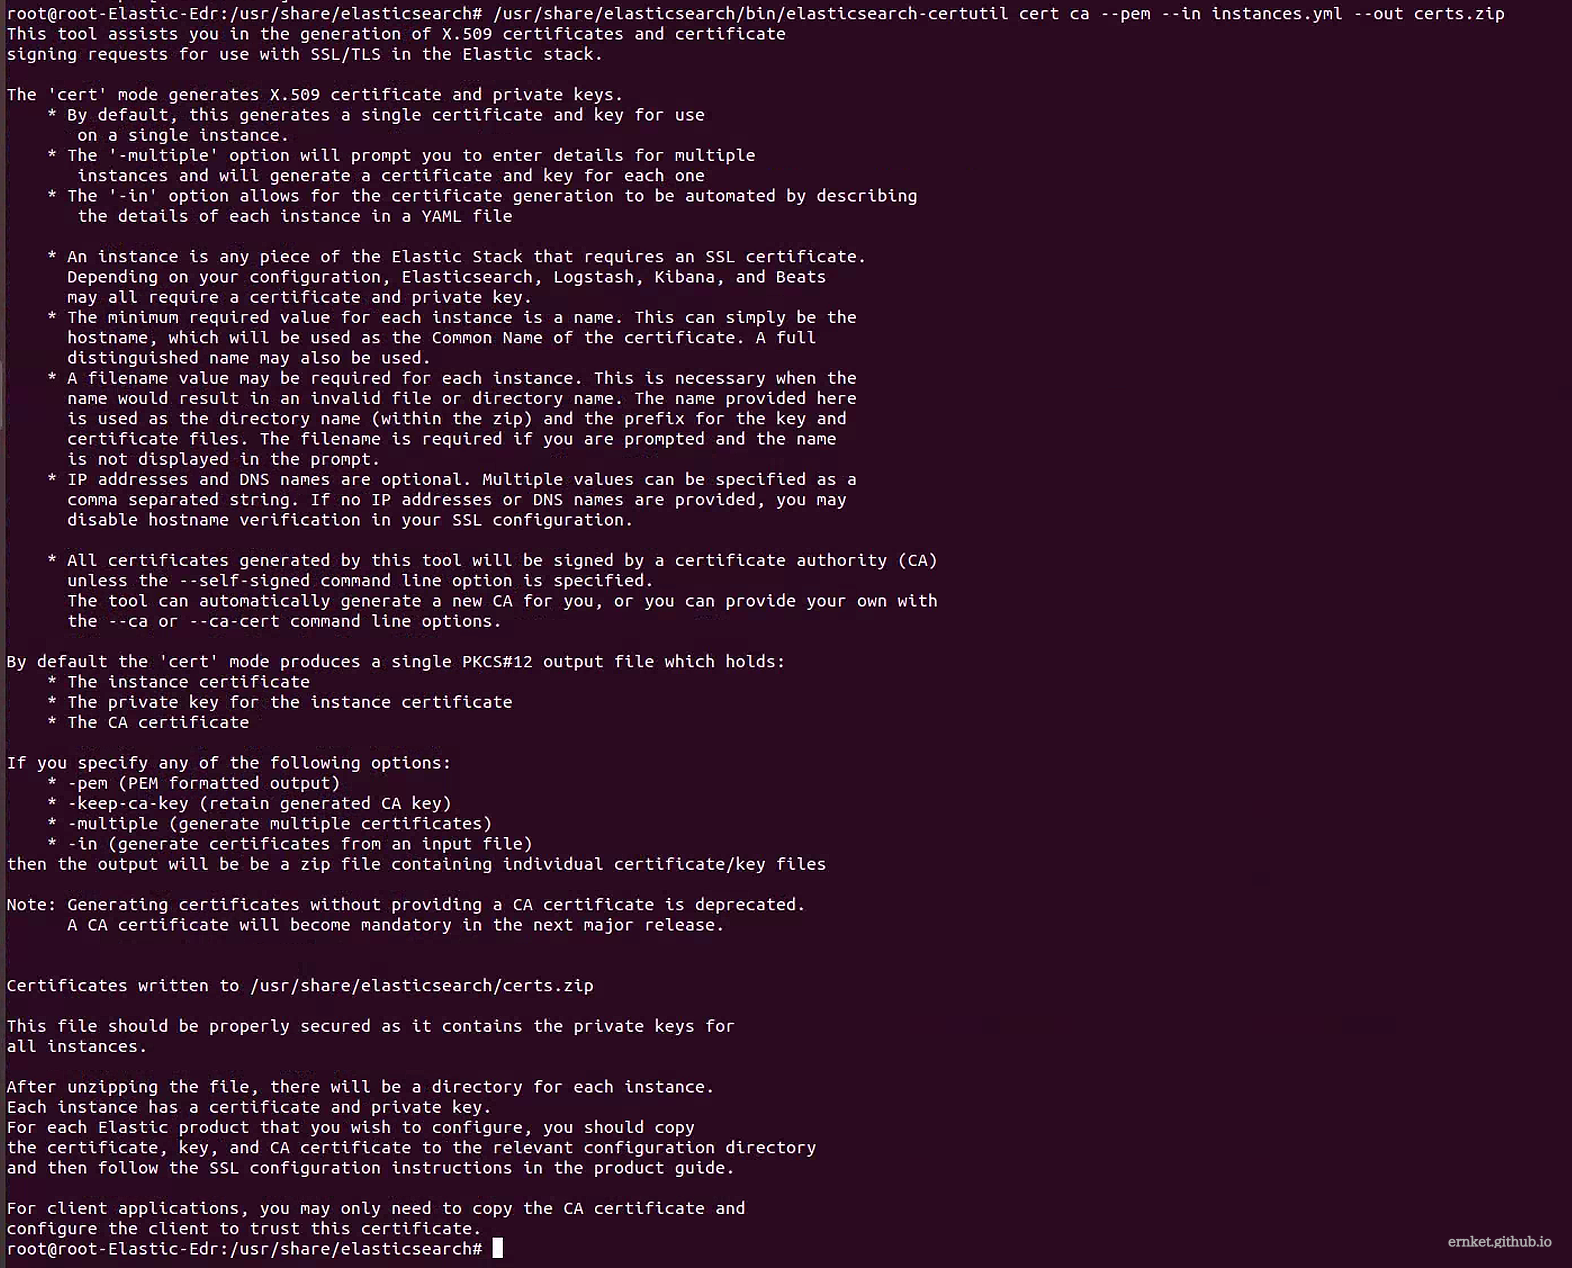
使用命令生成证书
1
| /usr/share/elasticsearch/bin/elasticsearch-certutil cert ca --pem --in instances.yml --out certs.zip
|
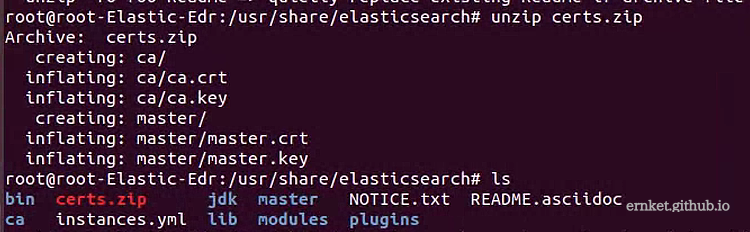
解压certs.zip到当前目录
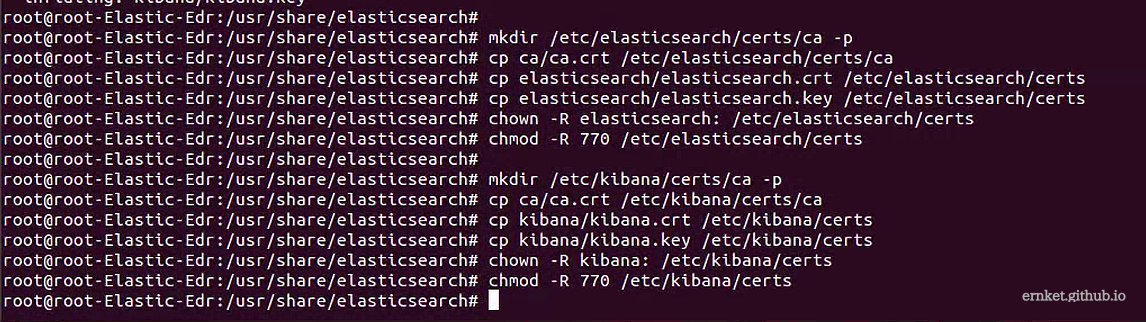
把Elasticsearch和ca目录的证书文件复制到/etc/elasticsearch/certs/目录,kibana也同样进行该操作
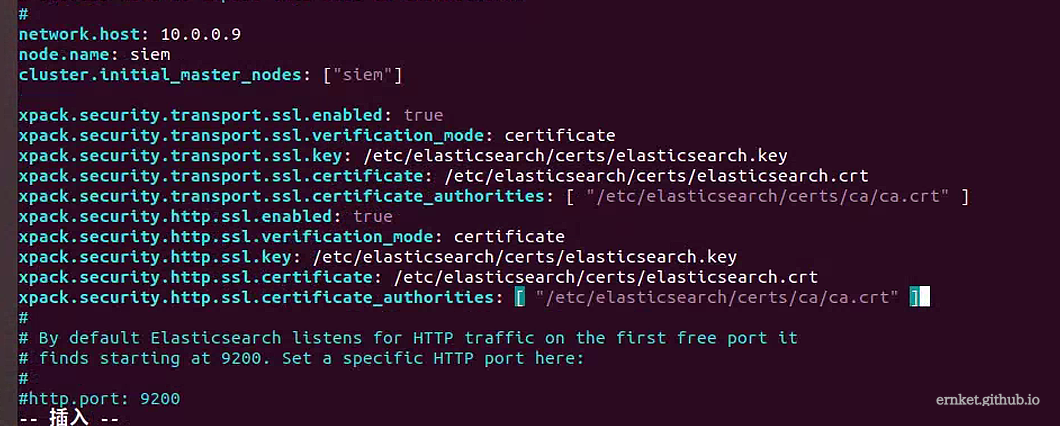
配置elasticsearch.yml文件,为Elasticsearch配置SSL
1
2
3
4
5
6
7
8
9
10
11
12
13
| # Transport layer
xpack.security.transport.ssl.enabled: true
xpack.security.transport.ssl.verification_mode: certificate
xpack.security.transport.ssl.key: /etc/elasticsearch/certs/elasticsearch.key
xpack.security.transport.ssl.certificate: /etc/elasticsearch/certs/elasticsearch.crt
xpack.security.transport.ssl.certificate_authorities: [ "/etc/elasticsearch/certs/ca/ca.crt" ]
# HTTP layer
xpack.security.http.ssl.enabled: true
xpack.security.http.ssl.verification_mode: certificate
xpack.security.http.ssl.key: /etc/elasticsearch/certs/elasticsearch.key
xpack.security.http.ssl.certificate: /etc/elasticsearch/certs/elasticsearch.crt
xpack.security.http.ssl.certificate_authorities: [ "/etc/elasticsearch/certs/ca/ca.crt" ]
|
重新启动elastic search,已经使用https进行传输了
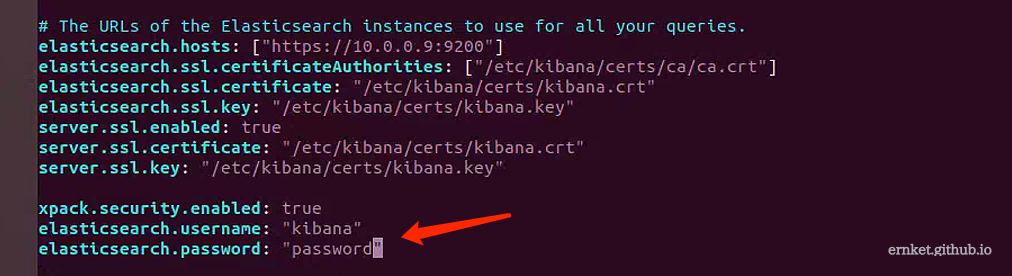
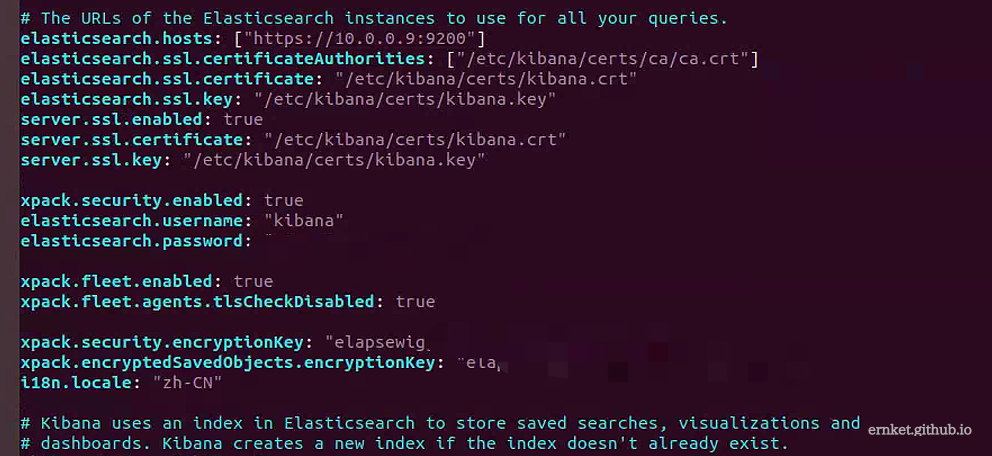
接着修改kibana的配置如下/etc/kibana/kibana.yml
1
2
3
4
5
6
7
| elasticsearch.hosts: ["https://10.0.0.9:9200"]
elasticsearch.ssl.certificateAuthorities: ["/etc/kibana/certs/ca/ca.crt"]
elasticsearch.ssl.certificate: "/etc/kibana/certs/kibana.crt"
elasticsearch.ssl.key: "/etc/kibana/certs/kibana.key"
server.ssl.enabled: true
server.ssl.certificate: "/etc/kibana/certs/kibana.crt"
server.ssl.key: "/etc/kibana/certs/kibana.key"
|

接着配置身份验证,修改elasticsearch的配置文件
1
| xpack.security.enabled: true
|

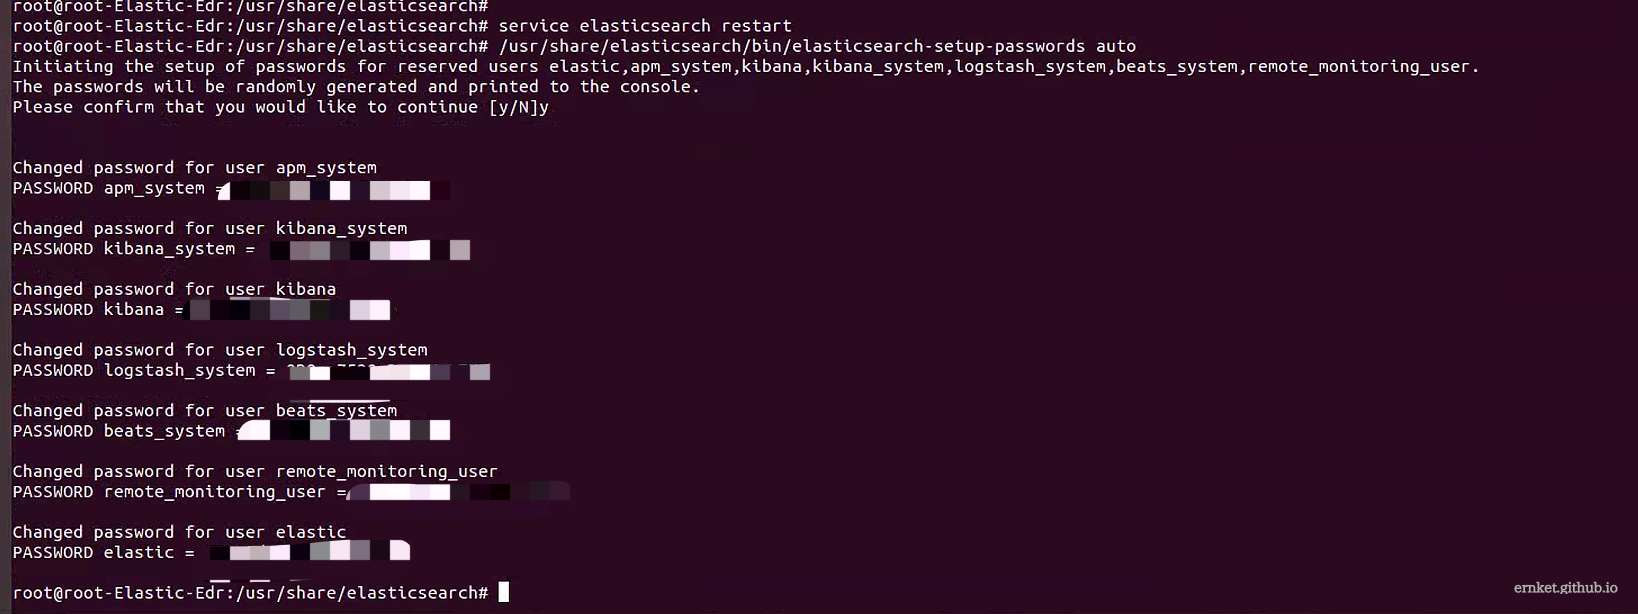
设置密码
1
2
3
4
5
| # 为4个用户自动设置密码
/usr/share/elasticsearch/bin/elasticsearch-setup-passwords auto
# 为4个用户手动设置密码
/usr/share/elasticsearch/bin/elasticsearch-setup-passwords interactive
|
忘记密码的话,重置方式如下
1
2
3
4
5
| # 1.先添加一个super权限的用户
/usr/share/elasticsearch/bin/elasticsearch-users useradd temp_admin -p temp_admin_passwd -r superuser
# 2.然后使用这个用户重置elastic用户的密码
curl -H "Content-Type:application/json" -XPOST -u temp_admin -p temp_admin 'http://127.0.0.1:9200/_xpack/security/user/elastic/_password' -d '{ "password" : "123456" }'
|
将密码配置在kibana中
完成后,重启elasticsearch和kibana
添加集成
首先添加kibana的配置,这里面的32位字符可以自行填写
1
2
3
4
5
6
| xpack.fleet.enabled: true //启用fleet,Fleet Server 是 Elastic Stack 的一个组件,用于集中管理Elastic Agent
xpack.fleet.agents.tlsCheckDisabled: true //关闭fleet tls检测 可不设置这项
xpack.security.encryptionKey:"32位字符" //需要配置才可以查看和创建检测规则
xpack.encryptedSavedObjects.encryptionKey:"32位字符" //不知道干嘛的,猜测是为了重启之后维持状态的,不设置可能会重启失败
i18n.locale: "zh-CN" //配置kibana语言为中文
|
接着,重启elasticsearch和kibana,使用前面生成的elastic用户登陆
在左侧进入fleet
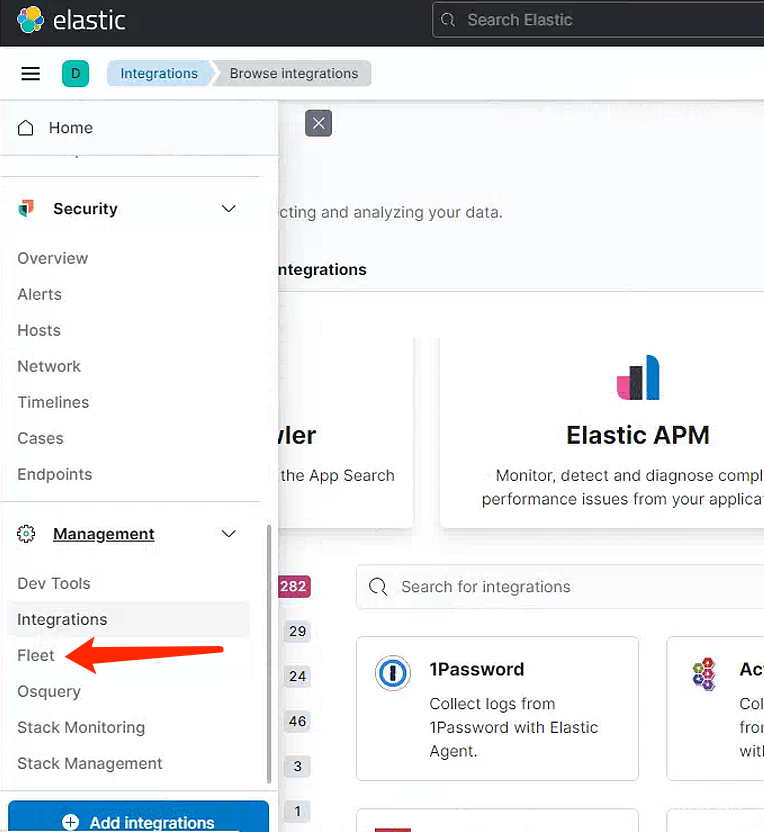
搜索security(忽略上下图中英文不一样,前面装的时候没配置中文)

点击添加后,设置名称即可
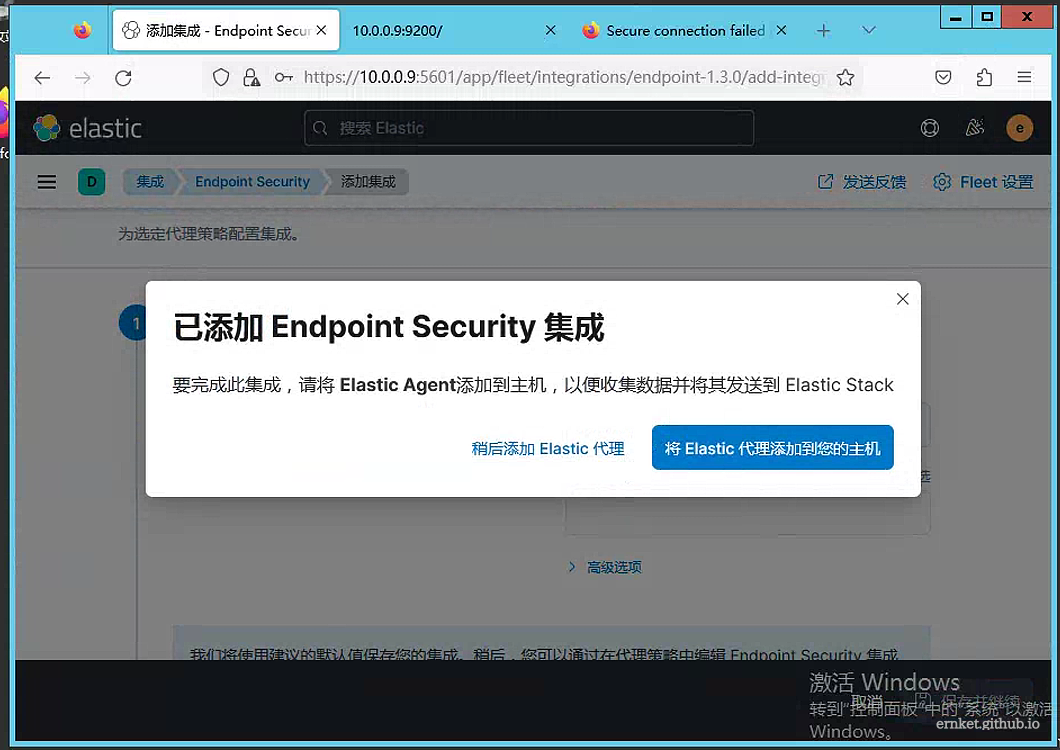
添加Agent
下载agent(我们是Ubuntu,所以先获取一个tar.gz的地址即可)
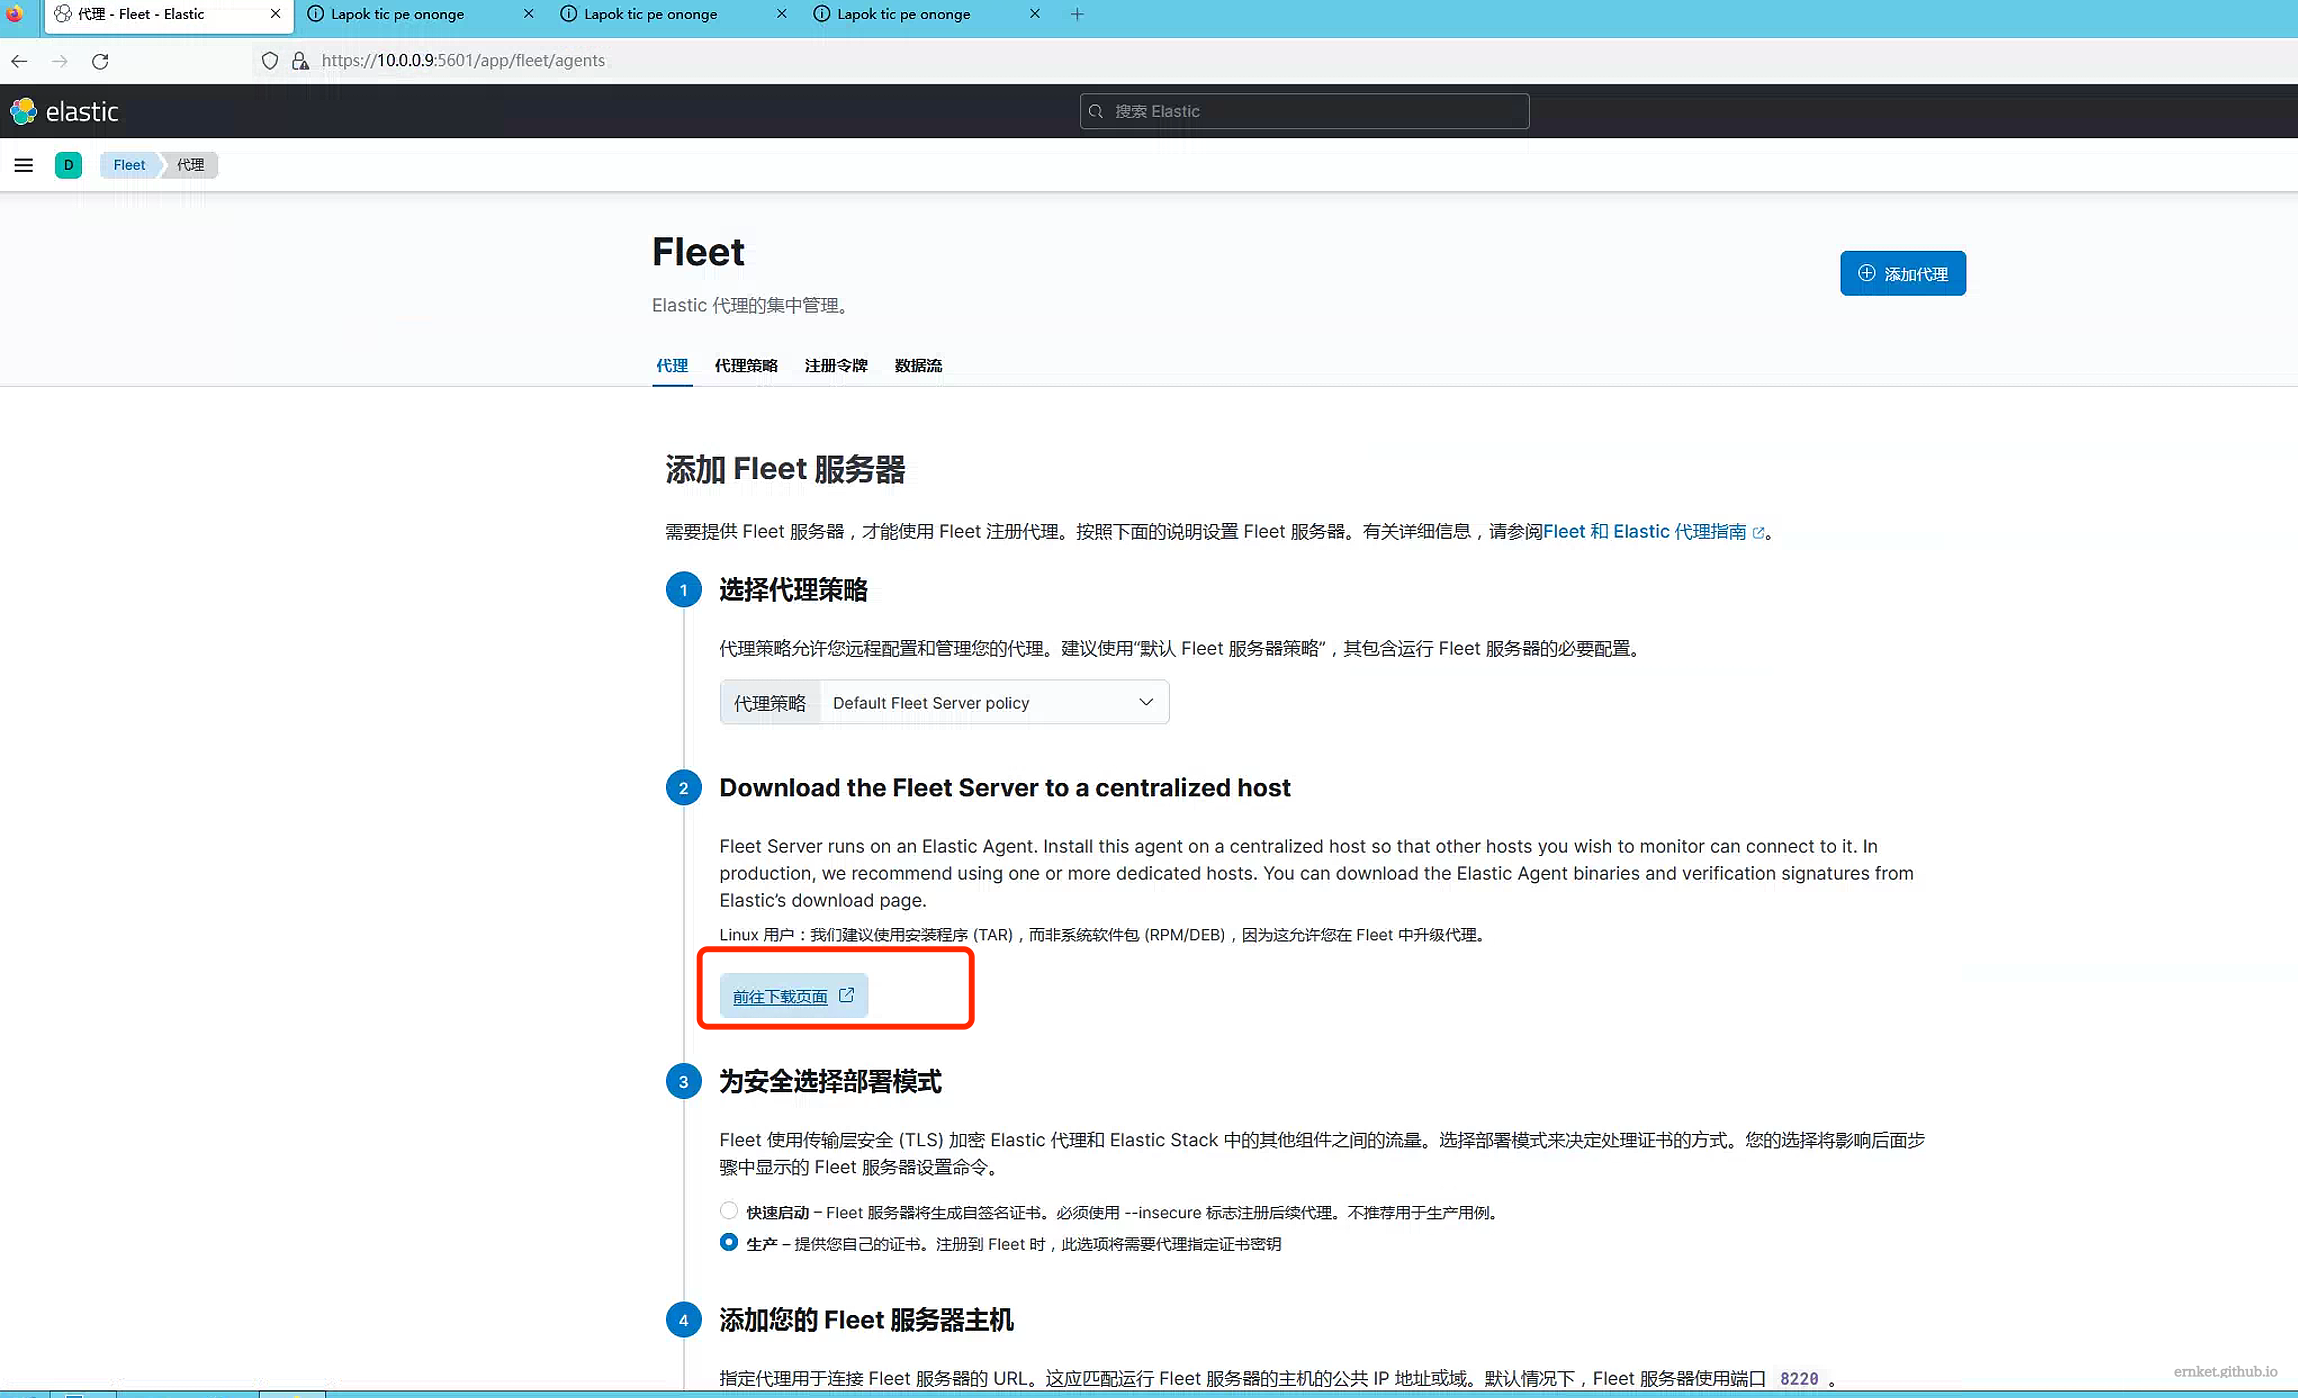
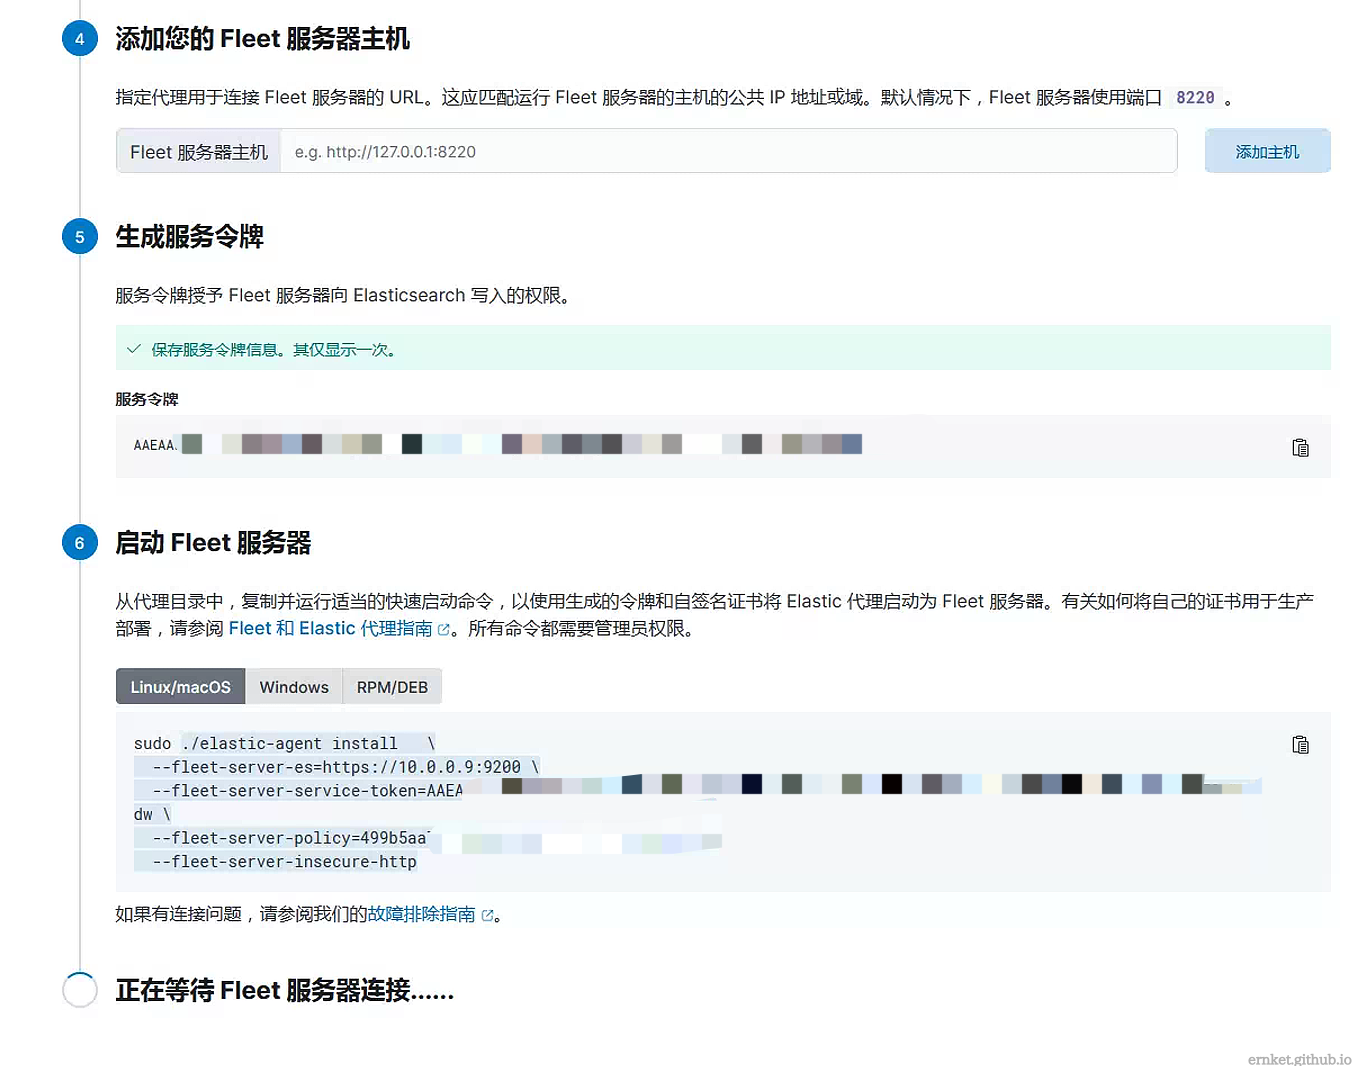
添加Fleet服务器主机,ip写自己,协议为https,端口是8220,点击生成
然后去ubuntu主机上,先信任自己的ca证书,证书是前面自己用elasticsearch-certutil生成的,移动到/usr/local/share/ca-certificates中,输入update-ca-certificates更新

安装agent,将前面获取的agent安装包地址,通过wget下载后,使用下面命令解压
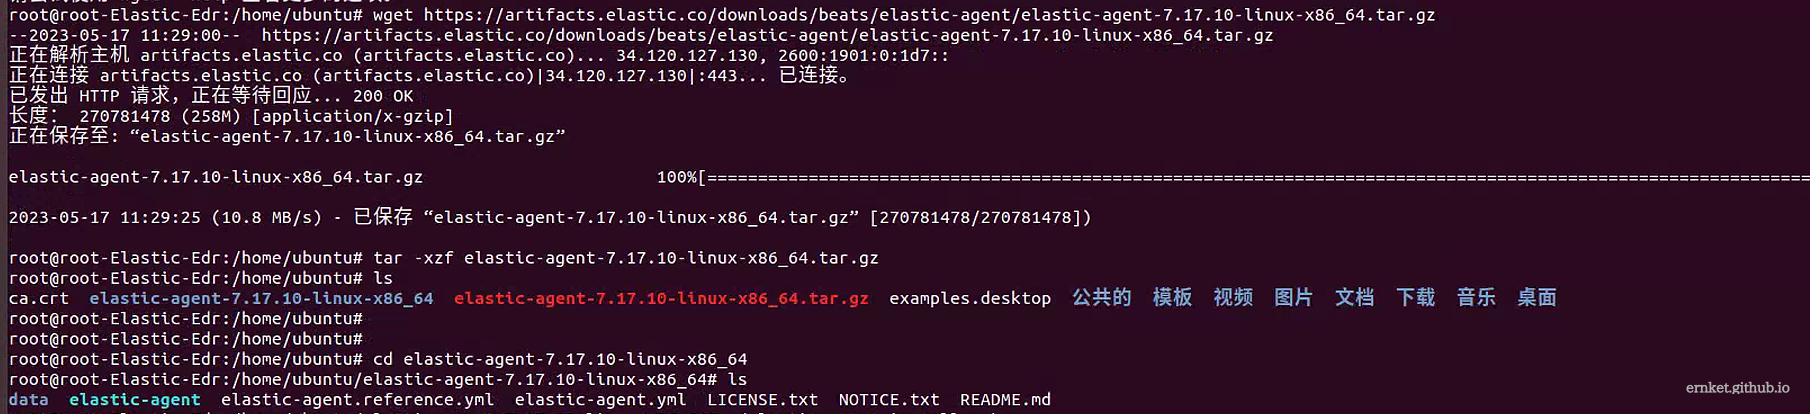
解压后,进入目录,输入前面web页面给的安装命令

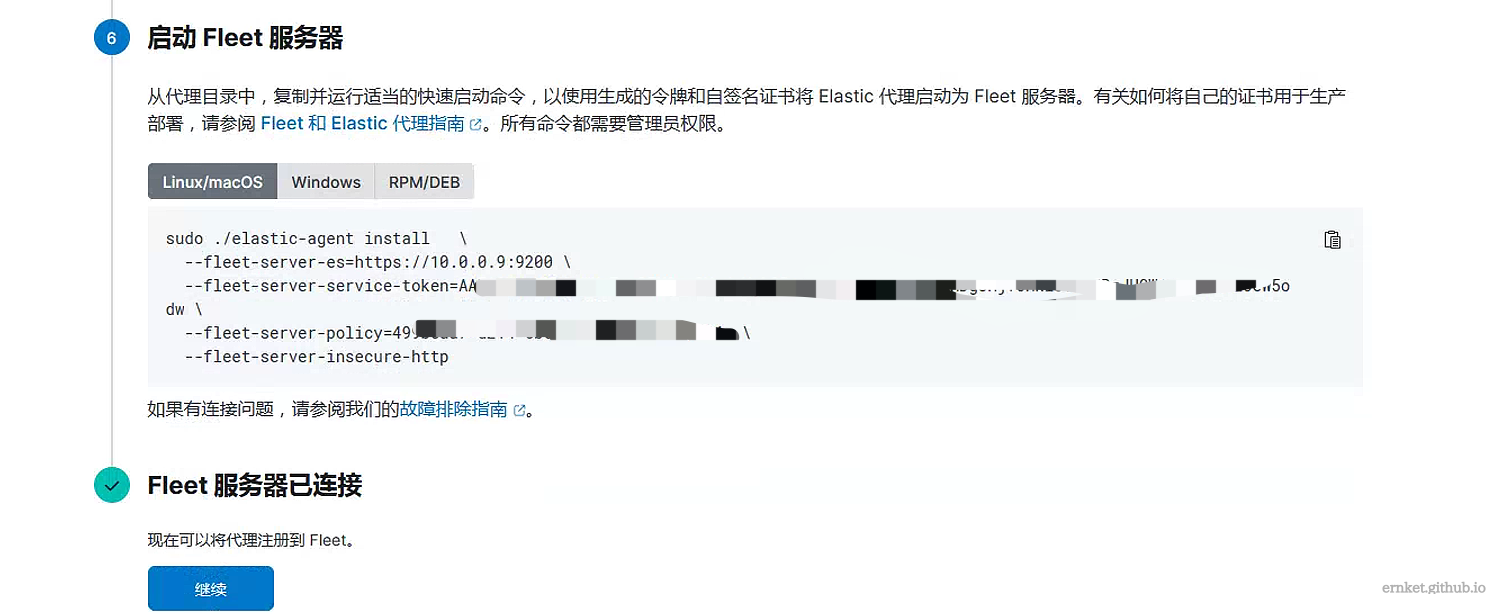
现在,我们可以将windows2012添加到代理中了
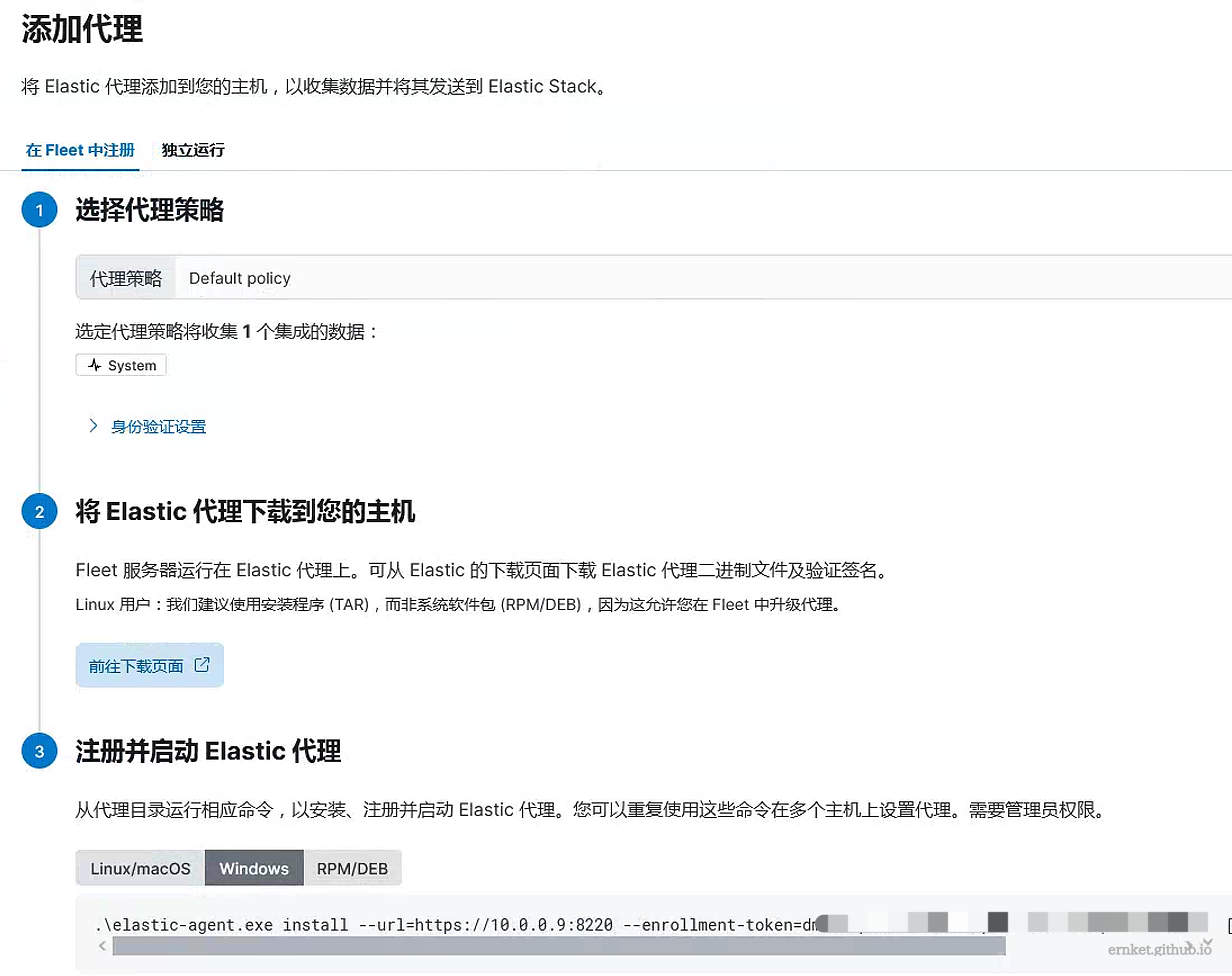
下载适用于windows的agent后,输入下面命令安装

记住后面需要加一个参数--insecure,不然会报错,提示无法连接
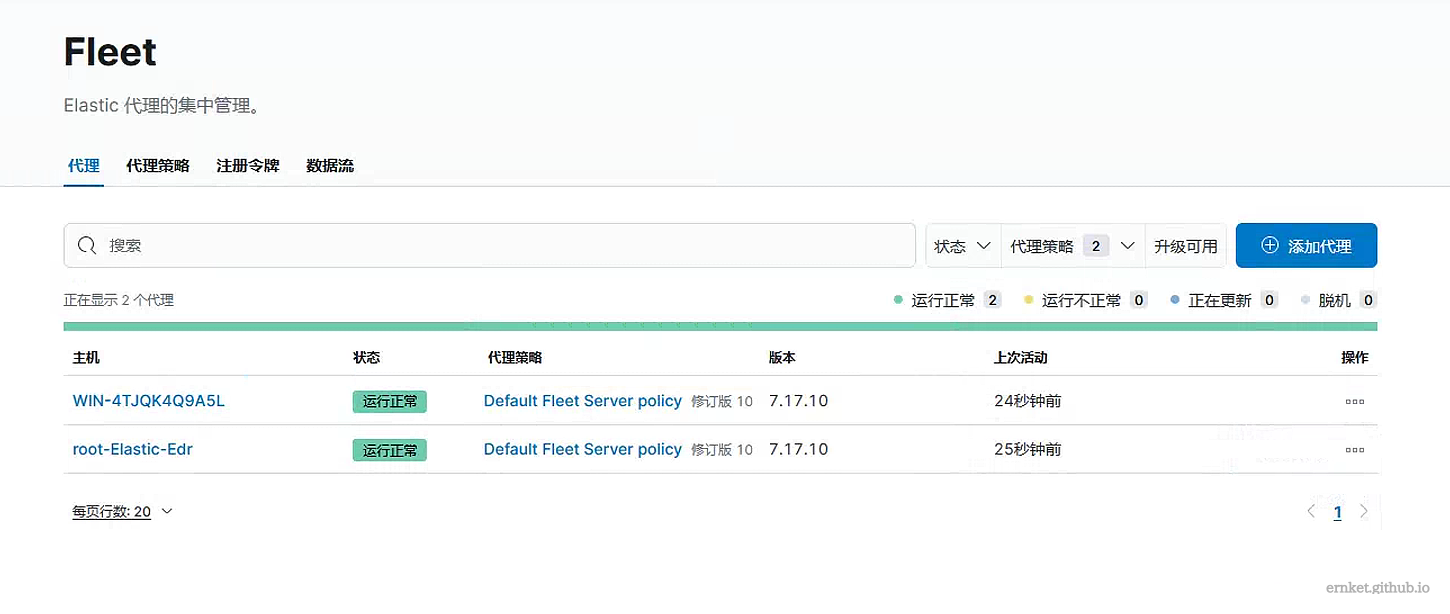
然后我们就能看到存在的两台机器了
安装Zeek
有两种方式进行安装
- 通过源码安装
1
2
3
4
5
6
| # 安装依赖
apt-get install cmake make gcc g++ flex bison libpcap-dev libssl-dev python3-dev swig zlib1g-dev
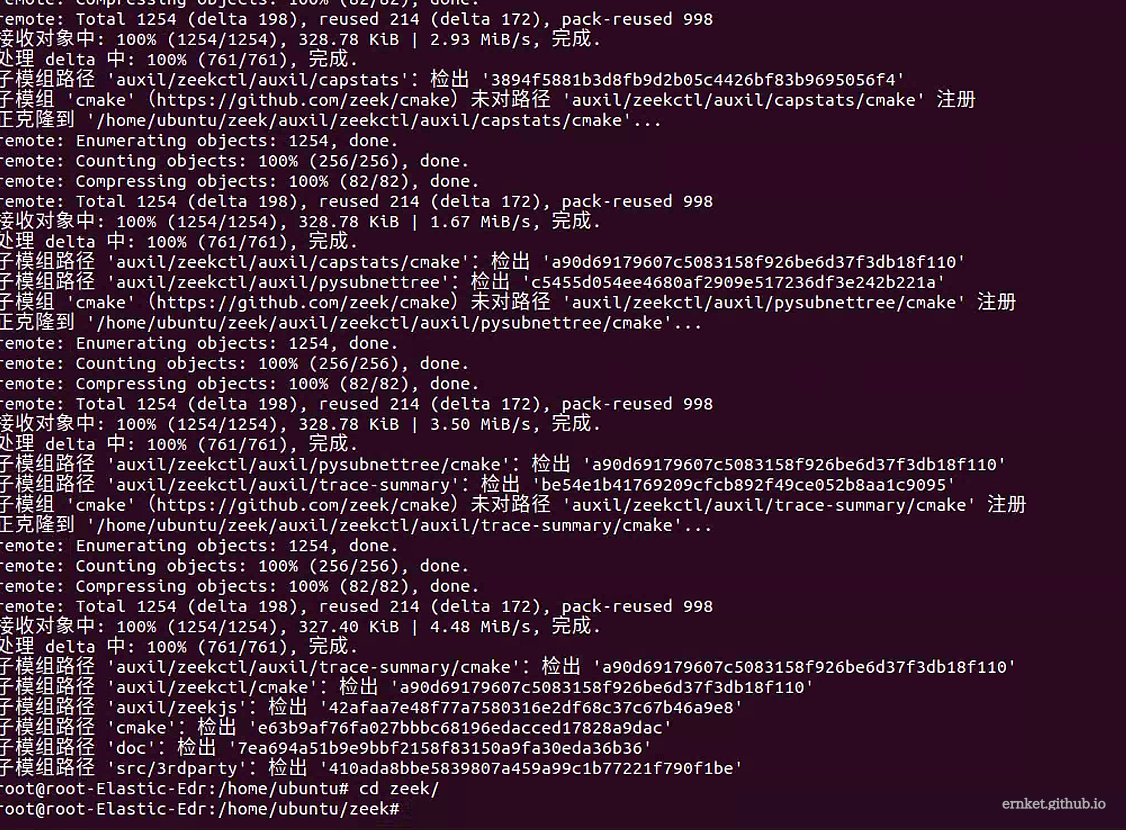
# 克隆项目编译安装
git clone –recursive https://github.com/zeek/zeek
./configure && make &&make install
|
但是这种方法建议自己在设置一个代理
1
2
| # ubuntu设置终端代理
export ALL_PROXY="socks5://x.x.x.x:xxxx"
|
- 通过软件源的方式安装
1
2
3
4
5
6
7
8
| # 安装依赖
apt-get install libpcap-dev libssl-dev zlib1g-dev python3 python3-dev cmake make gcc g++ flex swig bison libpcap-dev curl software-properties-common wget
# Ubuntu 20.04安装zeek服务
echo 'deb http://download.opensuse.org/repositories/security:/zeek/xUbuntu_20.04/ /' | sudo tee /etc/apt/sources.list.d/security:zeek.list
curl -fsSL https://download.opensuse.org/repositories/security:zeek/xUbuntu_20.04/Release.key | gpg --dearmor | sudo tee /etc/apt/trusted.gpg.d/security_zeek.gpg > /dev/null
sudo apt update
sudo apt install zeek
|
我这里使用了第一种方式安装
配置环境变量
1
2
| echo "export PATH=/usr/local/zeek/bin:$PATH" >> /etc/bash.bashrc
source /etc/bash.bashrc
|
安装第三方包
1
2
3
4
| pip3 install gitpython
pip3 install semantic-version
pip3 install git+http://github.com/zeek/package-manager@master
zkg autoconfig
|
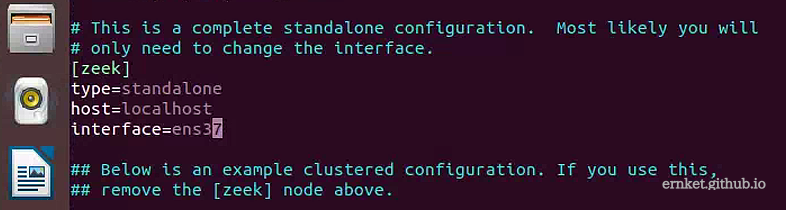
安装完成后,修改配置文件/usr/local/zeek/etc/node.cfg
(ps:网上的教程都是修改路径或者指定安装路径,例如/opt/zeek,但是我环境中的还是/usr/local/zeek,看教程好像也没修改什么,但是突然就变成了/opt下的路径,可能是他抄错了,也可能是我眼拙,当然,如果你在看别的教程出现ztc这个词,不用怀疑,那是etc)
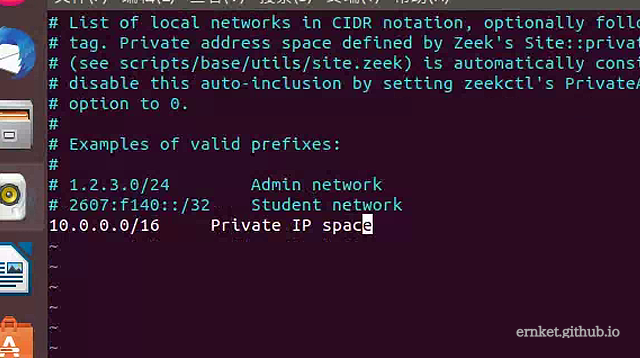
修改配置文件/usr/local/zeek/networks.cfg,设置要监听的段
修改配置文件/usr/local/zeek/share/zeek/site/local.zeek,将输出内容设置为json
1
2
| @load policy/tuning/json-logs.zeek
@load packages
|
加载配置,开始监听
1
2
3
4
| # 开始监听
zeekctl deploy
# 关闭zeek
zeekctl stop
|
添加zeek集成并部署
去集成里搜zeek

你如果要安装在新的机器,单独新建一个策略,然后再Fleet中安装即可,如果你像我一样,一台ubuntu做全部,那么
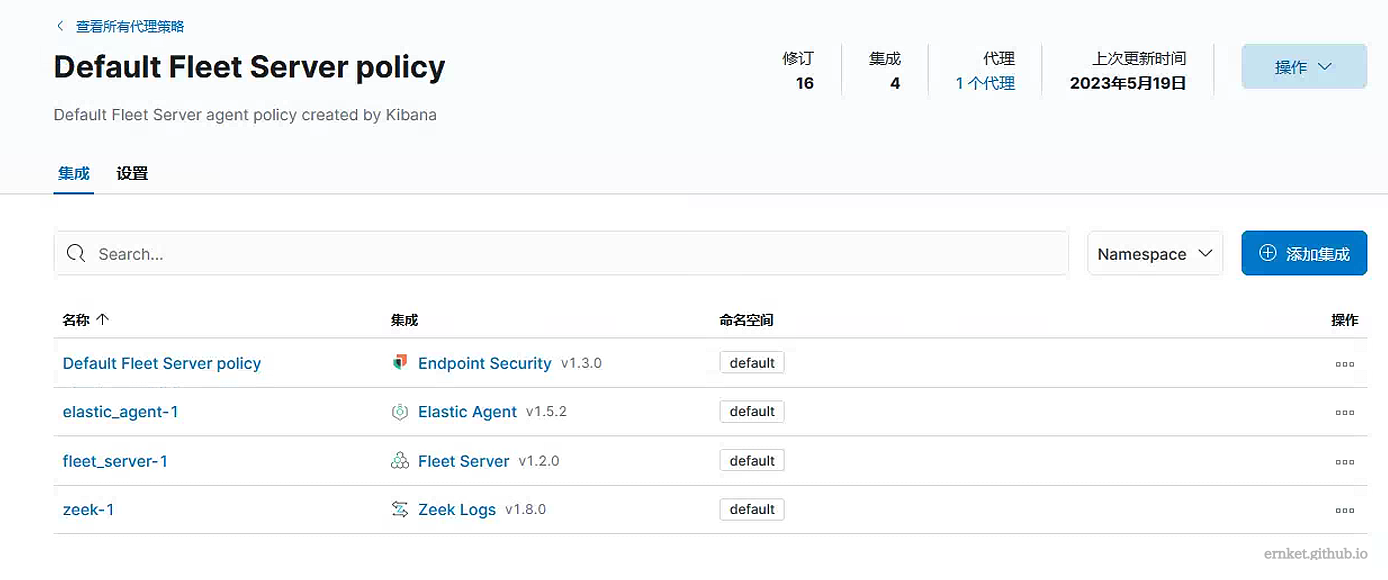
你在ubuntu的策略里,点右上角添加集成,添加zeek后,他就会自动下发了,方便快捷
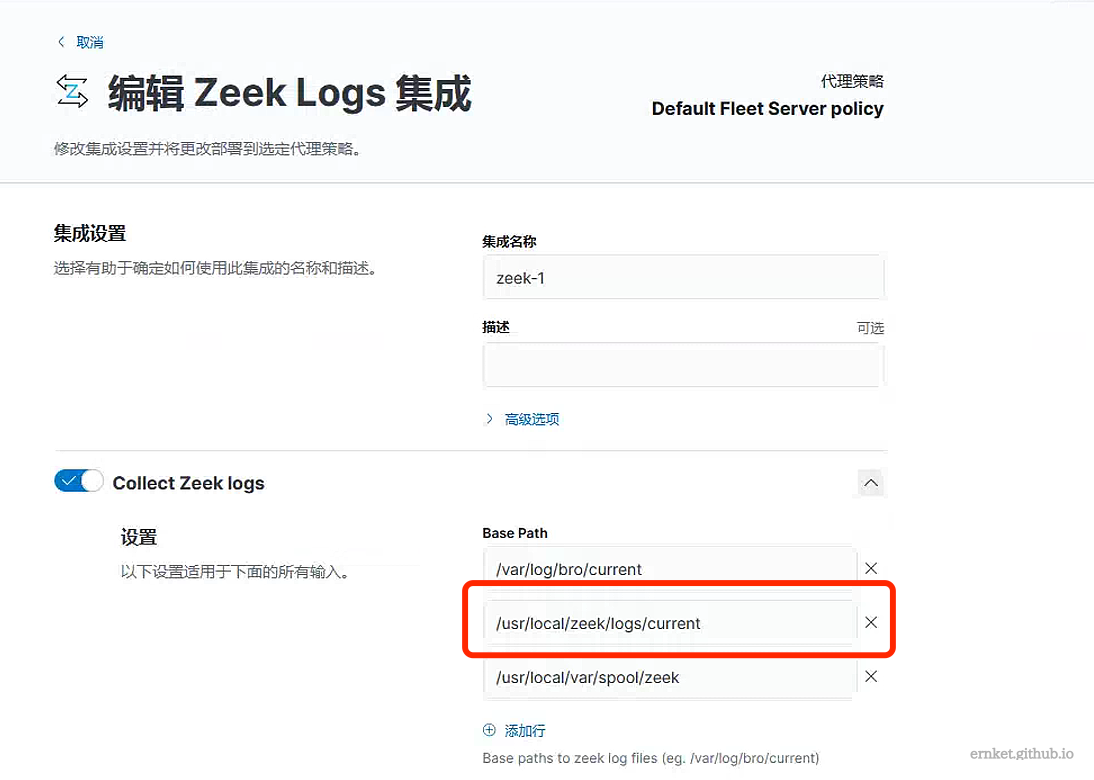
当然,特别注意一点,要修改这个路径
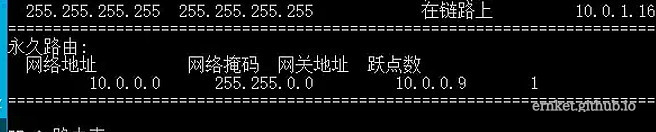
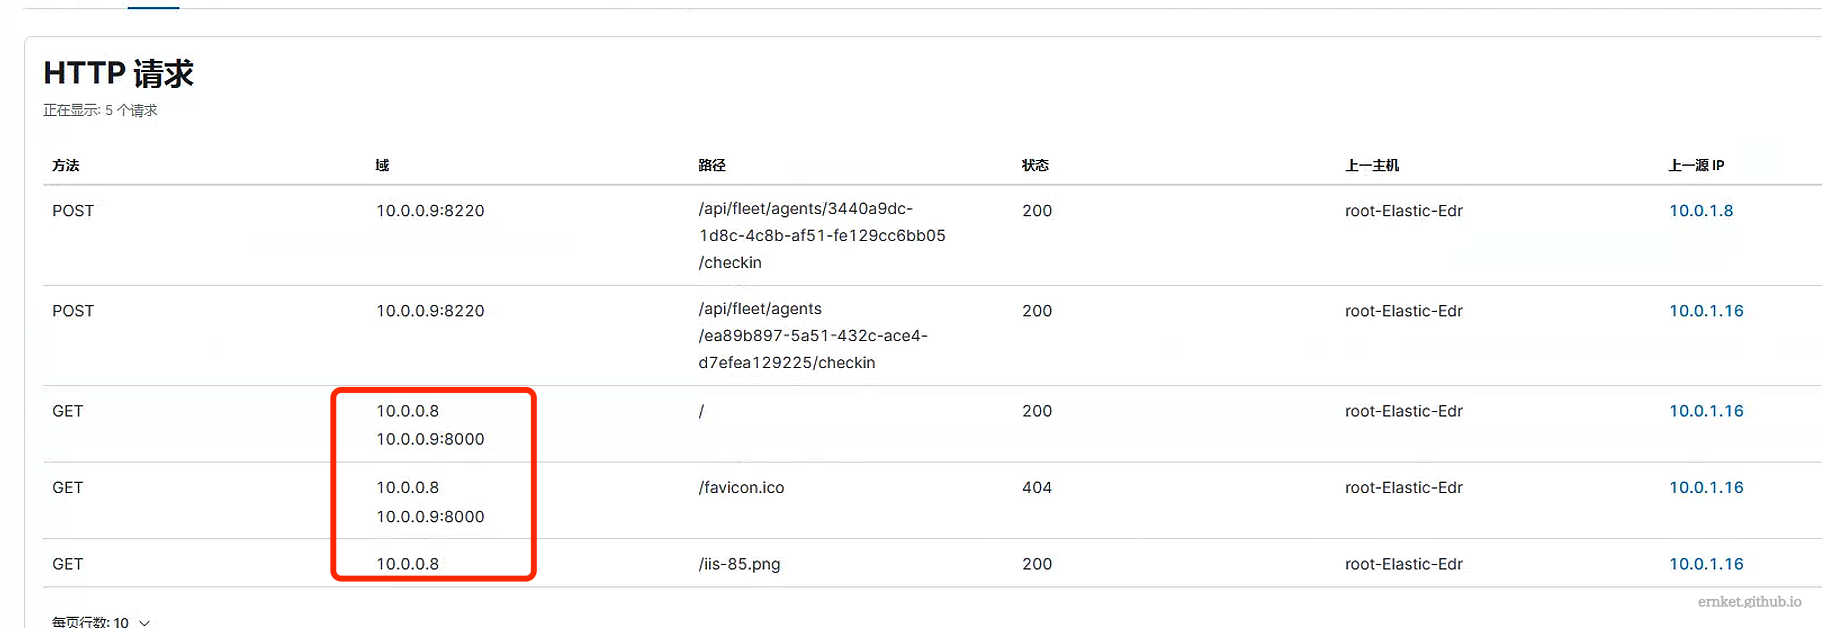
然后其他主机就可以设置路由到到zeek服务器
1
| route -p add 10.0.0.0 MASK 255.255.0.0 10.0.0.9 METRIC 1
|
接着你就能在网络中,测试你的请求了,我这边尝试请求了iis和python3开启的http
坑点集合
Cmake版本过低
在安装zeek的时候提示下面报错

先去https://cmake.org/files/下载所需要的版本
1
2
3
4
| wget https://cmake.org/files/v3.22/cmake-3.22.1.tar.gz
tar -xvzf cmake-3.22.1.tar.gz
chmod 777 ./configure
./configure
|
配置完成后编译
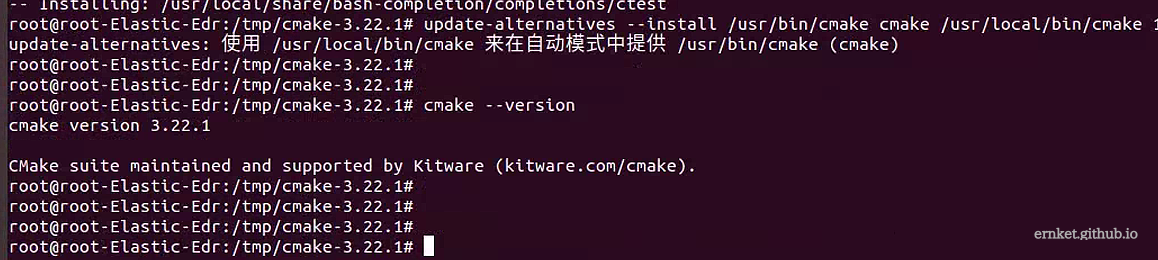
最后更新
1
| update-alternatives --install /usr/bin/cmake cmake /usr/local/bin/cmake 1 --force
|
gcc版本过低的问题
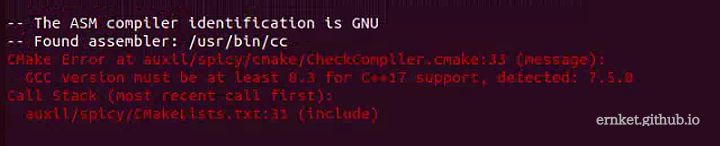
1
2
3
| apt install gcc-8 -y
apt install g++-8 -y
update-alternatives --install /usr/bin/c++ c++ /usr/bin/g++-8 100
|
安装agent后,没日志
记得把前面elastic生成的ca证书安装到机器上,然后在重新注册代理

参考文章
1
2
3
4
| https://mp.weixin.qq.com/s/QtBAG2TPAuU1eg0B0brszg
https://mp.weixin.qq.com/s/UWdOBmYxXStaqWeAFkbj1g
https://www.secrss.com/articles/29598
https://blog.csdn.net/UbuntuTouch/article/details/114023944
|