frp多级代理实验
实验总配置
| 名称 | IP | 配置内容 |
|---|---|---|
| VPS | x.x.x.x | [common] bind_port = 10080 token = <连接frps的密码> |
| Kali | 192.168.31.182 | frpc.ini [common] server_addr = server_port = 10080 token = <连接frps的密码> tls_enable = true disable_custom_tls_first_byte = true [pb] type = tcp local_ip = 192.168.31.182 local_port = 1234 remote_port = 1234 frps.ini [common] bind_addr = 192.168.31.182 bind_port = 7455 |
| Win7 | 192.168.31.48 10.10.10.7 |
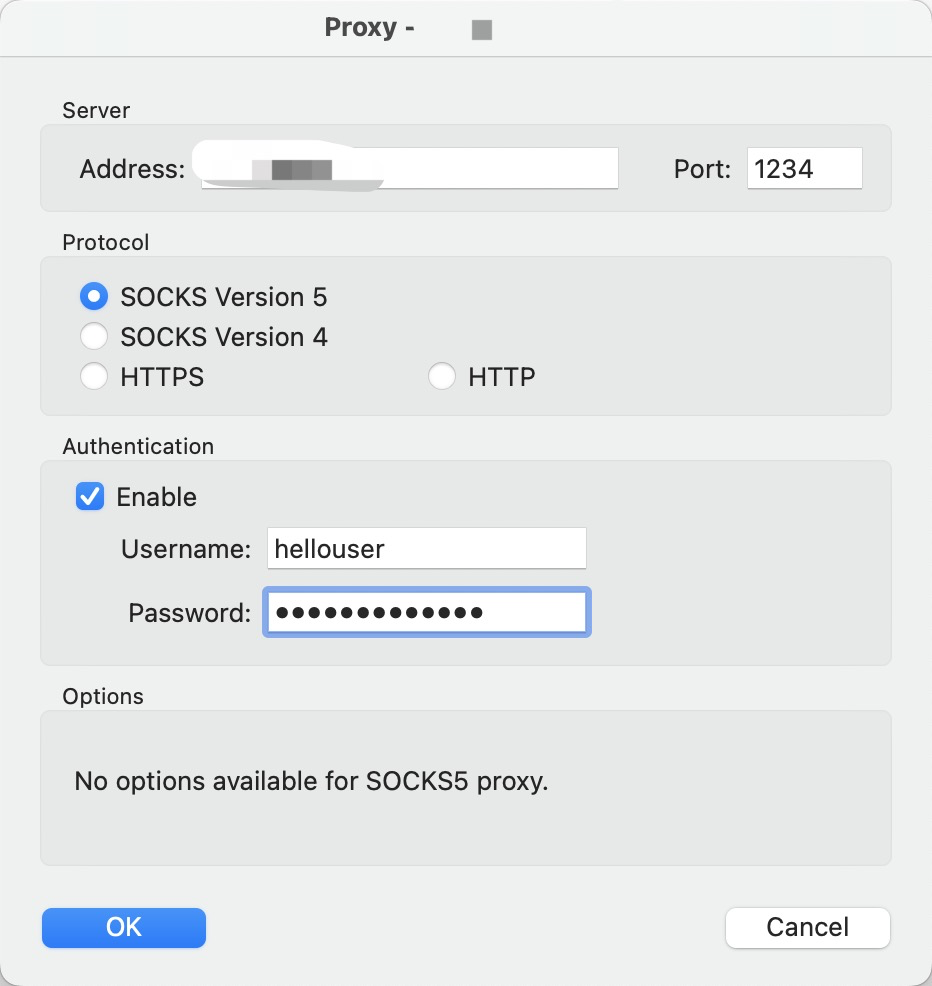
frpc.ini [common] server_addr = 192.168.31.182 server_port = 7455 [pb] type = tcp remote_port = 1234 plugin = socks5 plugin_user = plugin_passwd = |
操作步骤
目前的环境如下
hacker->内网->kali->win7->win2018
因为2018无法通过kali访问,所以只能通过win7上多级代理进行连接
为了方便理解,所以把三台机器的配置都放在了上面
首先vps开启frps
1 | [common] |
内网中的kali进行连接
1 | [common] |
注意,如果存在多级的代理,则每一个中继都是这种写法
1 | [pb] |
kali连接完成后,则需要再开启frps来接受下一级代理的流量
1 | [common] |
然后,就是win7了,因为我只做二级代理的实验,所以这里直接frpc就好了
1 | [common] |
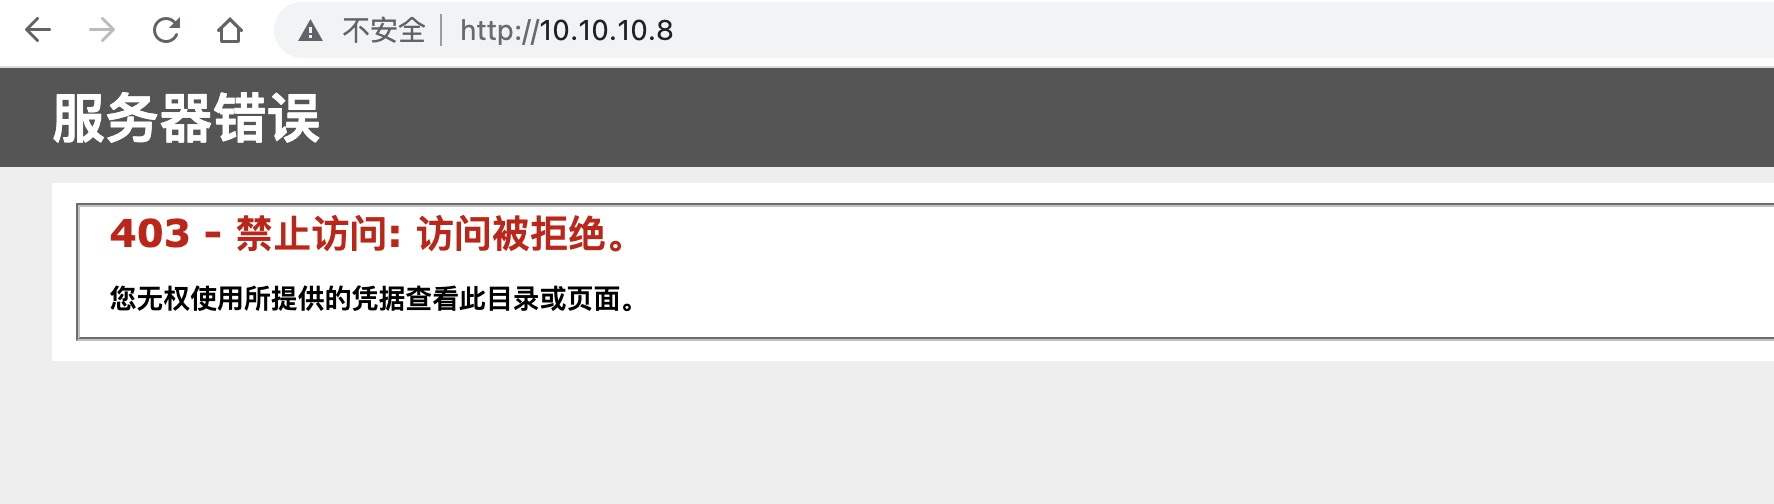
这个时候,你访问1234,就等于用的是win7的网络了
配置页面如下